Merry Old York – 21SEP2013
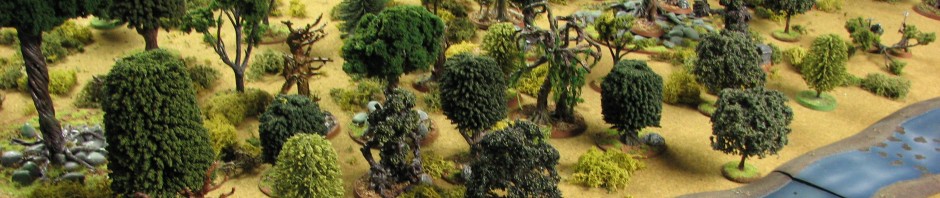
On Saturday September 21st, we christened the temporary HQ of the TDY Hodson Bunker while our esteemed leader is taking part in the Great Game. The game was Pig Wars, but no pigs were harmed nor looted in this scenario. We visited Merry Old York about 1100 AD. The battlefield consisted of a 4 foot square with the compass points aligned diagonally. To the North was the City Wall controlled by the Norman Duke and his Bishop, to the South was the River Ouse with a friendly Norse merchant tied up to trade, to the West was the Market Road that brought a stout troupe of Saxon Rebels to the town, and from the east came a merry band of Saxon Bandits. The town itself was further divided into the Westies dominated by the Beggar King’s guilds-men and the Easties controlled by the Eastside Rat-catcher and his urchins.
Duke Clarence the Clumsy’s morning ride was interrupted by the hue and cry of victims and Vikings as the Norse decided to trade with steel instead of gold. The Norse charged up the River Road and formed a shield wall near the docks. The Duke loosed his Wolfhounds and sent his men charging towards the river. As he thundered by an alley he espied a marauding group of Saxon rebels and turned aside to deal with these miscreants.

First blood went to the Westies as the Gamekeeper, bow in hand preparing for the morning hunt, skewered a Rebel with a goose-quilled shaft. One turn later, the Beekeeper, who was aiding the Gamekeeper with the hunt, speed another Rebel to his grave with a dart of death from the shadows. Hmm, maybe these villagers are going to be tougher than they seem. Meanwhile, to the east, the Bandits swarmed the fields and began to kill the peasants making their way to the Brewery.

At this point the raiders plans lost at least one wheel as the Wolfhounds blasted into the shield-wall and took several Vikings to Valhalla. Jarl Lodbroskon decided more loot could be had in the mill and chopped his way through the door to find it defined by a veteran with a sharp blade.

Vikings also thought the near by tavern would be easy pickings and chopped their way into the Tavern to find it deserted. Exiting into the rear courtyard, they discovered Hannibal the Dancing Bear who had just been loosed by his Trainer. The Bearserker and the Berserkers had a merry row.

The bandits charged into the Brewery and were unmanned by the titanic thews and guns of Brett Brewer. Unarmed, he snapped the necks of two Bandits and dared more to enter. Tiny Carl, the Bandit leader, finally entered the fray and jumped the Brewer. After much struggle, the Brewer and Apprentice were laid dead amongst the barrels.

Back at the river, the Norman cavalry overcame the Vikings and they retreated towards their boat and easier loot. The Normal cavalry also flanked the Jarl and Berserkers and hindered him from thoroughly looting the Mill even though he did manage to kill the Miller. The Bear made sausage of the Berserkers and turned the advance in that direction too.

The Saxon rebels had their advance forestalled, but they eventually killed the Games-keeper, the Beekeeper, and everyone in the house of ill repute. Recognizing discretion is the better part of valor, the Rebels gave up on their Rebellion and settled for stripping the cottages including the beds.

The bandits made it to the Church and stole the bible, a chest, a candlestick, and the Prior. They also broke into the Storehouse, but failed to search it and left behind a Ruby encrusted illuminated bible, a pure silver crucifix, and a relic of the one true 25mm cross. They even left the Monk unharmed and behind – clearly a case of “these are not the treasures you are looking for”.

The Norman Knights made a great show of thwarting the bandits, the vikings, and the rebels. Once the church was pillaged, the Bishop lead a personal charge against the Bandits and caused much more disruption to their plans to strip the east side of town. The Bandits were aided by a coven of three witches who finally managed to perform a spell, ringing the Bishop and two knights with a wall of fire while the Bandits made a strategic withdrawal.

When all was said and done, all factions had a similar showing with casualties ranging from 40% to 60%. The Bandits captured the most loot, followed by the Rebels, and the Vikings. I think everyone had fun and we just wished the “Colonel” was there!
Casualties:
-
Saxons – 8
-
Bandits – 9
-
Normans – 4 (3 dogs and 1 guard)
-
Vikings – 8
-
Villagers – 20 (Blacksmith, Butcher, Miller, Tanner, Brewer, Brewer’s Apprentice, Gamekeeper, Beekeeper, Bear Tamer, Old Geezer, 2 Woodsmen, Merchants, 2 Dogs, 2 Tarts, 2 Beggars, Farmer)
Loot:
-
Saxons – Chest (4), 2 Beds (3 ea), Honey Barrel (6) , 2 Chicken (1 ea) , Prisoner (2 – child), 2 Sheep (3 ea) – Total: 26 points of Loot
-
Bandits – Cart (6), 2 Beer Barrel (3 ea), Food Basket (3) , Large Candlestick (2), Illuminated Bible (10), Chest (6), Prisoner (7 – priest, minor noble) – Total: 40 points of Loot
-
Normans – No loot, but the town is intact and the loot is mostly undisturbed, just need to find more peasants
-
Vikings – 2 Chests (4 ea), 1 pile of Silver Pennies (10), 1 Crate (6) – Total: 24 points of Loot
-
Villagers – Kept their lives and most of the Loot
Scenario Details:
Background
Poor York, I knew you well. Back in the Roman day, the Ninth Legion defeated the Brigantes and founded Eboracum just south of Hadrian’s wall on the River Ouse. With affluence comes trouble – the Romans built a high, sturdy stone wall to keep out the riffraff. This worked until the empire collapsed and the not so Dark Ages settled upon the land. Eventually, Saxons conquered the region to be in turn conquered by Norse who named the place Jórvík and built a new trading town in the ruins. In turn, Duke William conquered the place, called it Yark, and sent Duke Clifford the Clumsy to serve as his high Sheriff. An uneasy peace settled in as Norse “traders” continued to come up the river to trade with the local mix of Saxon, Norse, and Scot inhabitants, the Duke lording it over from the castle and occasionally putting down unrest caused by Vikings, Saxon rebels and Saxon Bandits.
Objective
Loot the town or the looters. Collect victory points for Livestock, Beasts, Cloth, Hides, Barrels, Crates, Carts, and Prisoners and loose them at the rate of 5 points per casualty and the leaders for 10.
Geographic Points of Interest (direction from center of town)
Interior Gatehouse (N) Sergeant of the Guard and Guards in barracks
City Walls (N) – Night Watchman
Red Dragon Inn ![]() – Publican, Server, Wench, Minstrel, 2x Travelers
– Publican, Server, Wench, Minstrel, 2x Travelers
Merry Bear Tavern (SE) – Publican, Server, Wench, Rat-catcher, Dancing Bear
Miller (SW) – Miller, Son, Dog
Weaver (NE) – Black Death Victims upstairs
Baker (NNW) – Baker
Tanner (E) – Tanner
Church Ruins (E) – Bandit Hideout
Church (E) – 2x Monks
Monk’s Storeroom (SE) – Monk
Monk’s Cells (NE) – Monk
Brothel (NNW) – 2 Wenches
Scriptorium (NE) – Scribe and Apothecary (second story is the Priory)
Smithy (SE) – Blacksmith
Brewery – Brewer
Market Road (NW-NE) – 3 Vendors
River Road (N-S)
Docks & River Ouse (S) – fisherman
The Factions
Normans

Duke Clifford and Retinue
Duke Clifford plans a good day of hunting and is headed out the city gates when the alarm sounds – those peaceful Norse merchants seem intent on pillaging the town from their serpent ship. Loose the dogs of war! The scribes have details on all the buildings in town, but you seldom bother with the particulars beyond attending the new church. Your nose confirms a Tannery, you can hear a smith’s hammer, you can see a Serpent ship docked at the river, and your men are all too familiar with the Dancing Bear Tavern, the Red Dragon Inn, and the brothel just outside your gates.
- Replenish your store house with lawfully seized stolen goods.
- The Vikings are your enemies – close to combat if visible and withing 12 inches.
- Your Warband:
- Duke Clifford the Clumsy – Fully Armored Leader with Sword (Class III)
- 4x Fully Armored Mounted Knights with Lance (Class II)
- 4x Wolfhounds (Class III)
Minster Guard

Bishop Pierre du Hoc planned a lazy day counting up the debts versus the limited funds in the Duke’s treasury while he is out chasing Wolves. However, the miserable locals are up in arms again. Why didn’t I stay in a monastery in France? Your scribes have details on all the buildings in town, but you seldom bother with the particulars. Your nose confirms a Tannery, you can hear a smith’s hammer, you can see a Serpent ship docked at the river, and the Duke’s men are all too familiar with the Dancing Bear Tavern, the Red Dragon Inn, and the brothel just outside the gates. You are most familiar with the Saxon church, you once attended a service in the old ruins before they were burned when you were a young priest visiting Saxon England. You are glad the Duke built the new church and regularly visit the Dormitory, the Scriptorium, and the Storehouse. Its is past time to raise more money to build a separate, cloistered monastery.
- Remove your loot through the interior City Gate; alternatively you could try to stash in in one of the five church buildings: old church ruins, new church, scriptorium, dormitory, or storehouse in a pinch.
- Sound the alarm, rescue the townspeople, keep the gate open as long as possible, and escort the villagers to safety.
- Save the Church relics – scrolls, bible, cross, and chest of plate!
- Your Warband:
- Bishop Pierre du Hoc – Armored Leader with Mace (Class III)
- 4x Fully Armored Mounted Knights with Lance (Class II)
- 12x Fully Armored Spearmen (Class I)
- 3x Unarmored Crossbowmen (Class I)
Townsfolk
Oh to be free and not oppressed. The Saxons, Normans, Norse, and Bandits seem not to understand how to make a buck. Time to defend what is mine and maybe take some while I am at it.
Townsfolk are in most rooms and all the intact buildings. They can defend their loot or abandon it to flee to the safety of the castle. If they want to make a stand, they do so on an odd die roll. Remember everyone else is scoring victory points by looting you. Leaving it to your heirs is a good thing, but having your estate looted is not. The Townsfolk can be split into the Westies and the Easties that reside on the more affluent west side of River road or the seedier east side of River Road, all outside the town walls. The the rulers of these realms are Eastside Rat-catcher who operates out of the Dancing Bear Inn and the Beggar King that keeps watch near the Town gates.
Easties

Your domain is encompassed by the territory south of the City Walls and to the east of the River Road. It includes the forest, the old ruins, the ruined church, the Monk cells, the Monk Storage House, the Scriptorium, the Weaver, the Tannery the Blacksmith, the Horse paddock, a vegetable patch, two pig pens, a sheep pen, a cattle pen, the Dancing Bear Inn, part of the dock area, and the eastern half of the market road. River road is no-man’s land in your rivalry with the Beggar King. Your minions include four urchins that you fully control and are hard to catch. You can use them to scout and filch things.
- Rat-catcher – Unarmored – Staff (Class III)
- Urchins (Class 0) – place wherever you like in your territory – they can move anywhere once the game begins.
- Blacksmith – Unarmored – Hammer (Class II)
- Brewer – Unarmored – Improvised (Class II)
- Scribe – Unarmored – Staff (Class II)
- Tanner – Unarmored – Bow (Class II)
- Armed Villagers (Class I) – with various tools or weapons – bows, clubs, spears, swords, etc.
- Unarmed Villagers (Class O)
- Clarence the Bear Tamer (Class I) and his friend Hannibal the Dancing Bear (Class III)
Westies

Your domain is encompassed by the territory south of the City Walls and to the west of the River Road. Your domain includes, the hunters’ cottages, the brothel, the baker, the miller, the chandler, the Red Dragon Inn, part of the dock area, and the western half of the market road. River road is no-man’s land in your rivalry with the Rat-catcher. Your minions include four beggars that you fully control and are hard to catch. You can use them to scout and filch things.
- Beggar King – Unarmored – Staff (Class III)
- 4x Beggars (Class 0) – place wherever you like in your territory – they can move anywhere once the game begins.
- Gamekeeper – Partially Armored – Bow (Class II)
- Miller – Unarmored – Sword (Class II)
- Two Mercenaries – Partially Armored – Swords (Class II)
- Armed Villagers (Class I) – with various tools or weapons – bows, clubs, spears, swords, etc.
- Unarmed Villagers (Class O)
Vikings

Crew of the Red Serpent
Jórvík was my kind of town. This place just needs a bit of cheering up! By Odin, it is nothing a little mead, a pretty thrall, and a beautiful bonfire will not straighten up. You see before you a mill, a large Inn, a Tavern, can hear a smith at work to the NE, can smell a Tannery to the NE and in the far distance can see the city walls.
- Store your loot on your ship.
- Normans are your enemies – close to combat if visible and withing 12 inches.
- Your Warband:
- Jarl Ubba Lothbroksson – Fully Armored Leader (Class III)
- 6x Partially Armored Warriors (Class I)
- 6x Fully Armored Warriors (Class II)
- 1x Unarmored Warriors (Class O)
- 3x Unarmored Bowmen (Class 1)
- 3x Partially Armored – shield Beserkers (Class III)
Rufus Redbeard
Ubba said the pickings would be good, so you tied up your ship outboard of the Red Serpent. The fleet’s in! You see before you a mill, a large Inn, a Tavern, can hear a smith at work to the NE, can smell a Tannery to the NE and in the far distance can see the city walls.
- Store your loot on your ship.
- Add Ubba as you see fit.
- Your Warband:
- Rufus Redbeard – Fully Armored Leader (Class III)
- 6x Partially Armored Warriors (Class I)
- 6x Fully Armored Warriors (Class II)
- 1x Unarmored Warriors (Class O)
- 3x Unarmored Bowmen (Class 1)
- 3x Partially Armored – shield Beserkers (Class III)
Saxons
Rebels

Ealdorman Uhtred has had enough of Norman tyranny and plans to take back a little bit that rightfully belongs to him as the heir of the defunct Kingdom of Northunbria. If nothing else some loot and winsome lasses will brighten up his damp castle. You have never been here before, but can see before you a walled compound, to your left the city walls, and your other senses confirm a Tannery by its stench, a smith by the ringing of a hammer, and the cry of gulls betrays the tidal river.
-
Take your loot off the board from the Market Road heading west (where you entered).
- Saxon bandits are your enemies – close to combat if visible and withing 12 inches.
-
Your Warband:
- Ealdorman Uhtred – Fully Armored Leader (Class III)
-
2x Fully Armored Swordsmen (Class II)
-
11x Partially Armored Spear / Swordsmen (Class I)
-
2x Unarmored Spear / Swordsmen (Class 0)
-
4x Unarmored Bowmen (Class I)
Bandits

Tiny Carl’s bandits used to thrive on the King’s Highway until Norman patrol and justice starting to put a dent in the business. His solution is to move his business to town. Norman, Norse, or Saxon matters not to him as long as they are willing to pay the tax! I wonder what this new town is like? Surely it has a tavern, a brothel, and a place to rest. Bandits armed per model, use improvised if not obvious.
- Store your loot in the old church ruins.
- Saxon rebels are your enemies – flee to safety if visible and withing 12 inches.
- Your Warband:
- Tiny Carl – Partially Armored Leader (Class III)
- 8 Unarmored Bowmen (Class I)
- 8 Unarmored Thugs (Class I / II)
- Witch Coven (Class I, Class II, & Class III):
- Cast a hex turning your victim into a giant frog – Cast 7+, Resist on 9+; Priest Resist on 4+
- Cast a 4” wall or 4” diameter ring of impassable fire – once cast remains until witches disrupted or intentionally stop the spell if they keep chanting; can be dispelled by Bishop on 7+; sets flammables ablaze on 5+
- Use poison in melee; -2 to block.
Pig War Variant Rules:
- Use D12 instead of card draws
- Any warrior with shield and one-handed weapon can participate in shield wall
- Treat all 2 Stripe and 2 Stripe as Heroes with multiple wounds

Sounds like a lot of fun! Great looking pictures, beautiful details, a great report!
Phil,
Thanks it was a lot of fun. I really like Pig Wars – easy to play and little cause for rule controversy.